I’ve had a few requests for this post so I hope you find it helpful and learn from my mistakes and triumphs.
***
Ever so often, I am mistaken for a photographer.
In conversation someone will actually call me a photographer.
This always gets a chuckle out of me. I mean, if I was a real photographer and I overheard someone call someone like me a photographer, I would be appalled.
Like, highly offended.
That’s like calling me a professionally trained chef. Heck, that’s like calling me a professional athlete. Completely inaccurate and a slap in the face of people who actually are any of these things.
But I have to admit, my photography looks 900,000% better now than when I first started this blog. And that’s obviously not because I’ve become this incredibly artistic photographer, full of information about aperture and shutter speeds.
I still go cross eyed when people start talking about these things.
I can never remember what more or less of either of these things do, much less how to change them on my actual camera.
But there’s no denying that my photos look better.
Don’t get me wrong, when I look at the photography on 101 Cookbooks or My New Roots, I swoon. I am aghast at their breathtaking photos of food. Mine do not hold a candle.
But at the same time, I’m proud of my photos. I’ve come a long way (baby), since the early years way back in 2009. I mean, that was an entirely different decade. Ages ago.
So while I can’t tell you how to take photos of people, wiggly dogs, or landscapes, I can tell you how to take a picture of food with a few tips.
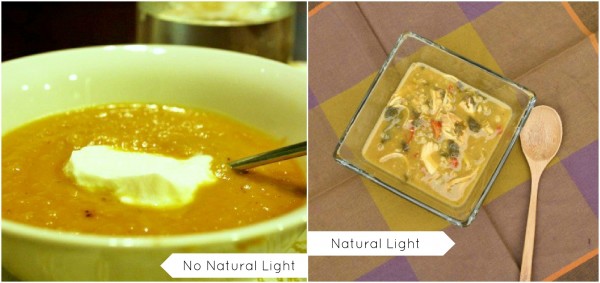
1. Use Natural Light
I remember reading blogs of bloggers who work from home and thinking, why do their photos look SO much better than mine? The main culprit was my lack of natural light. I worked over an hour away when I first started this blog so natural light was really only available during the summer months and on the weekends. Now, I will go through hell and high water to make sure my photos are shot with natural light. It’s easier for me now, since I only work in an office setting part time, but it’s not always easy. I have to plan my cooking and photography around the daylight hours. Sometimes this means making a recipe the night before, then photographing it the next day.
Moral of the story: You can’t change your lifestyle to get natural light, but you can change your photography habits and this will make a world of difference in the quality of your photos.
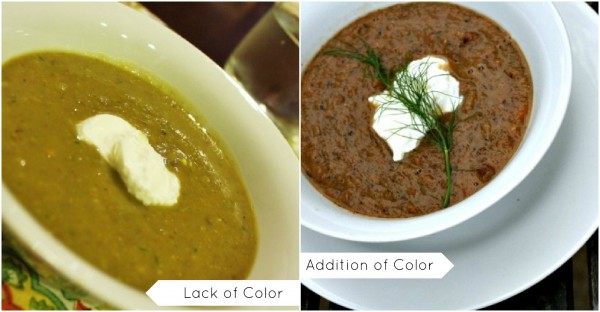
2. Add Color
Some of the most delicious food just does not photograph well. Too much brown, white, or yellow is just not very attractive in pictures. I try to add a bit of color to these photos with a sprinkle or sprig of herbs. You could even sprinkle a colorful spice on the dish or the plate, like cayenne pepper or paprika. A citrus fruit wedge is always pretty if the flavor is included in the recipe and/or will compliment the flavor. Your color addition needs to be relevant to the recipe. For example, this soup might be prettier with a lime wedge on the side of the plate, but it has nothing to do with the recipe.
Moral of the story: When your food is bland in color, find a way to highlight its flavors with a pop of color.
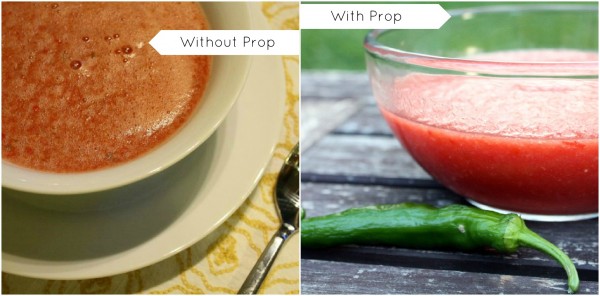
3. Use Props
This should really be titled “adding color 2.0” because using props have a similar result — they make your photo prettier. But sometimes, I use props to also pinpoint a star ingredient like the jalapeno in my Watermelon Jalapeno Gazpacho. Sometimes the star ingredients aren’t obvious in the dish’s photos and adding a prop like a jalapeno can spice up your photos. Pun intended.
Moral of the Story: When a star ingredient isn’t visible in your photography, use the ingredient as a prop in your photos to add interest.
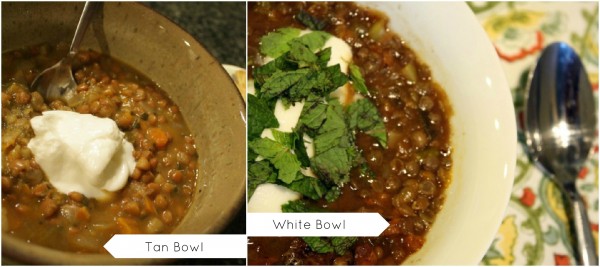
4. Plate on White Dishes
I don’t always adhere to this rule if I think the food will look good in a colorful dish, but white dishes look good for any dish. When dealing with colorful dishes, only certain complimentary colors (depending on the color of your dish) works. White dishes always work (unless all of your food is white, then please see tip #3).
Moral of the story: Using white dishes almost always looks best.
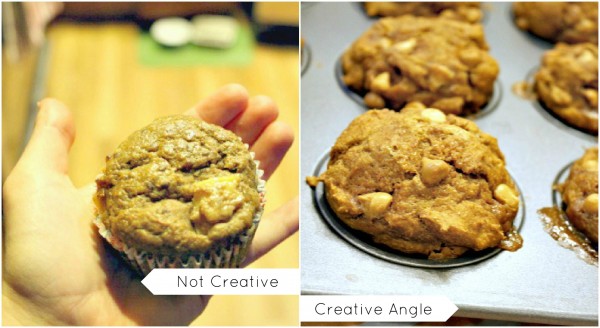
5. Take Some Creative Camera Angles
When taking the photo on the right, Brad assmed I was only photographing part of the muffin tin because he snagged a muffin before I took any photos. I explained to him that taking off center photos of part of the muffin tray is much more interesting and creative than a whole pan shot. For some reason, off center photos are much more pleasing to look at when it comes to still objects. I also find that if I take a bunch of creative angles, I’ll usually get some shots that I never would have “planned” to use, but they just work.
Moral of the story: Take a lot of photos at different angles. When you’re reviewing, you’ll be surprised at how many of the “weird” angles work.
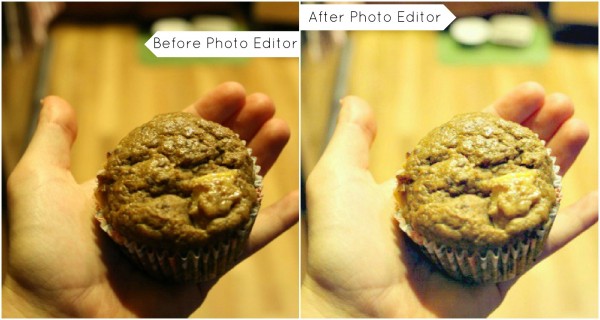
6. Easy Photo Editor
When all else fails, I use a really easy photo editor to make my photos look good, or at least better. The comparison above is remarkable and was really easy to achieve with my photo editor. I export all of my photos to Picasa first and select the “I’m feeling lucky”, “Auto Contrast” and “Auto Color” for almost every one of my photos. On rare occasions the light will be perfect and it won’t need much photo editing, but this is what I typically do. If the photo still needs some work, I’ll upload it to Pic Monkey (picmonkey.com) and do further editing. They have an “Auto Adjust” option, which I usually try first. I’ve found that this only improves my photo about 50% of the time. In the above photo, I really upped the brightness, slightly upped the highlights and the saturation. Playing around with these tools really makes a difference in my photos.
I’ve also used Pic Monkey to remove a bra that was showing in a photo as well as put makeup on friends and give them a little tan. If I’m going to harass my friends with my camera, the least I can do is make sure they look their best.
Moral of the Story: Find something that is easy to use that will allow you to improve your photos when these other strategies fall short.
The most important tip I can give you is to read food blogs with beautiful photos and learn from them what looks good. I thought my photos looked fine back when I first started blogging, but now I know otherwise. I observed how other’s photos looked different than mine and worked to improve my photos by emulating them in my own way. I like to think that my photos have their own creative flare in spite of the inspiration I have gotten from other food bloggers and I hope to continue to improve as I learn more about what my camera can do.
I loved writing this post because it came straight from my readers. If you have any questions that would make for an interesting blog post, feel free to comment or email me directly at kelly@foodiefresh.com

